How to Turn Off Continuous Baking in Unity 5
Lighting in Unity can be daunting, because there are so many ways to light your game, depending on the result you're aiming for. From lightmaps to Point Lights and Spot Lights, it's tough to decide which one to use in your game.
While Unity makes it easy to place dynamic lights in your game scene and make your game look great, it can get a bit complicated when you're choosing between Unity's many light types, each of which has unique properties and effects.
This article will cover the basics of lighting in Unity and help you on your journey to mastering Unity. Without further ado, let's jump right in.
In this article:
- Direct lighting and indirect lighting
- Light types in Unity
- Directional Light
- Point Light
- Spot Light
- Area Light
- Light modes in Unity
- Real-time Lighting
- Mixed Lighting
- Baked Lighting
Prerequisites
This article assumes the reader has at least a basic understanding and experience with Unity, though it will still provide value if you're new to Unity. If you're completely new, you can download Unity here.
Direct lighting and indirect lighting
To understand lighting in Unity, you must first understand the concept of direct and indirect light.
In Unity, direct light is light that has zero or one bounce. Direct lighting is mostly observed when looking directly at the light source or when staring at an object that is directly receiving the light source.
On the other hand, indirect lighting is light that has two or more bounces before hitting the observer's eyes. Here's a pictorial description of both light types.
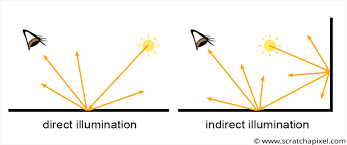
In Unity, indirect light with four bounces and above is known as Global Illumination (GI). GI is a system that models how the light of one surface affects another surface, and it's an important part of Unity lighting that helps give scenes a realistic look.
You can set up and control the number of bounces in your scene by going to Window > Rendering > Lighting > Lightmap Settings.

Now that we understand what direct and indirect light is in Unity, let's look at the different light types in the game engine.
Light types in Unity
There are four types of light in Unity. To access them, all you have to do is right click on your hierarchy. Here's how it looks:
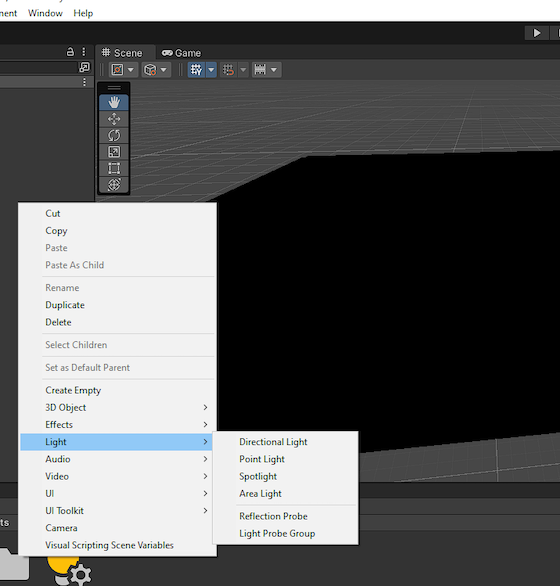
As you can see, the four types of light in Unity are:
- Directional Light
- Point Light
- Spot Light
- Area Light
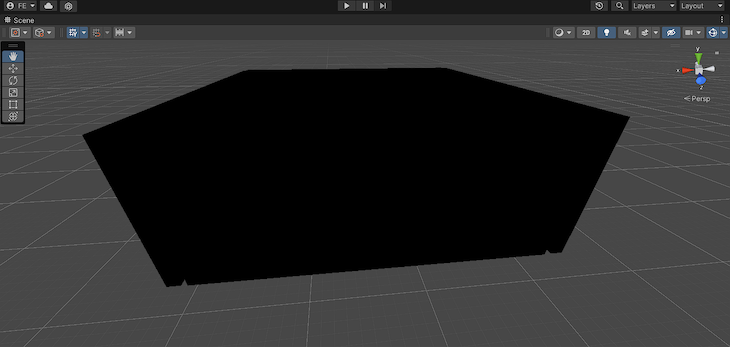
Now, we're going to look at each of these light types in detail. To test them all out, I've created a sample scene. As you can see below, the scene is completely dark because all the default lighting has been removed.
Directional Light
Directional Light represents large, distant sources that come from a position outside the range of the game world. This type of light is used to simulate the effect of the sun on a scene. Here's an example of how the previous scene changes when directional light is added to it.

The position of the Directional Light does not matter in Unity because the Directional Light exerts the same influence on all game objects in the scene, regardless of how far away they are from the position of the light.
You can use the transform tool on the Directional Light to change the angles of the light, mimicking sunset or sunrise.

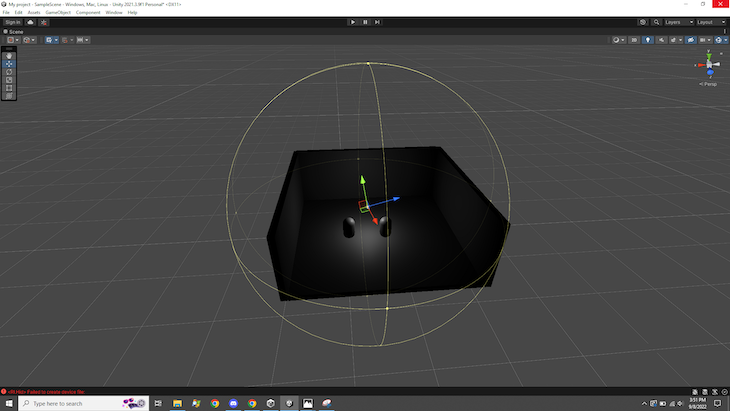
Point Light
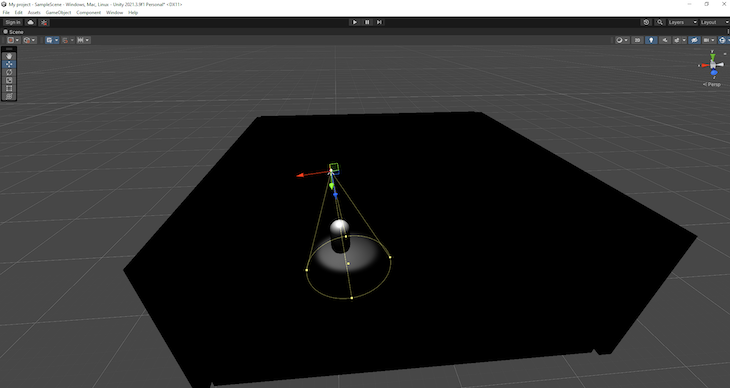
Unlike Directional Light, a Point Light is located at a point in space and equally sends light out in all directions. Point Light also has a specified range and only affects objects within this range, which is indicated by a yellow circle.
The further away an object is from the Point Light, the less it is affected by the light. And if you take an object out of the circle, it won't be affected by the light at all.
Point Lights in Unity are designed based on the inverse square law, which states that "The intensity of the radiation is inversely proportional to the square of the distance." This means the intensity of the light to an observer from a source is inversely proportional to the square of the distance from the observer to the source.
Point lights can be used to create a streetlight, a campfire, a lamp in an interrogation room, or anywhere you want the light to affect only a certain area.
Spot Light
Point Lights and Spot Lights are similar because, like a Point Light, a Spot Light has a specific location and range over which the light falls off.
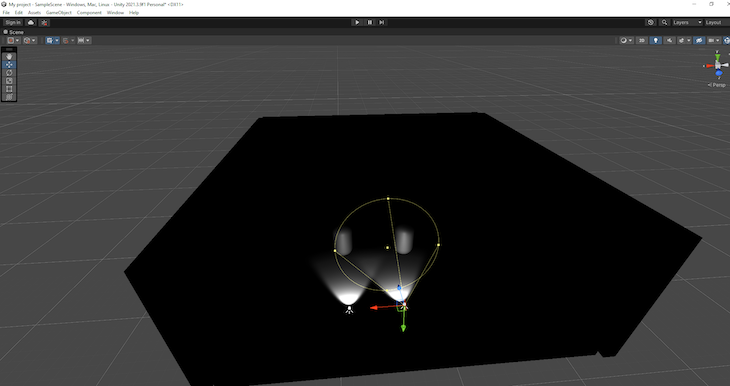
However, unlike the Point Light that sends light out in all directions equally, the Spot Light emits light in one direction and is constrained to a specific angle, resulting in a cone-shaped region of light.
Spot Lights can be used to create lamps, streetlights, torches, etc. I like using them to create the headlight of a car, like in the picture below.
Area Light
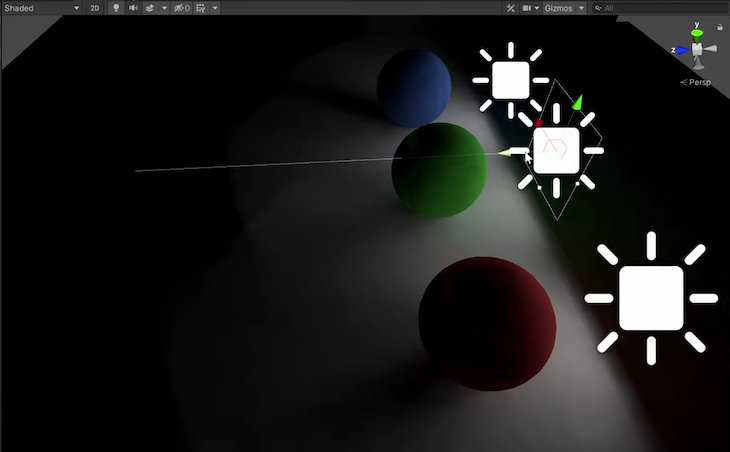
Like Spot Lights, Area Lights are only projected in one direction. However, they're emitted in a rectangular shape. Unlike the three previously mentioned lights, Area Lights need to be baked before they can take effect. We'll talk more about baking in a bit, but here's an example of what Area Lights look like when used in a scene.
Now that we're done looking at the different light types, let's look at different light modes in Unity.
Light modes in Unity
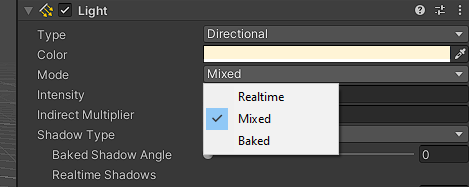
There are three main light modes in Unity:
- Real-time
- Baked
- Mixed
Real-time Lighting
In Unity, all the calculations for light, i.e., shadows, brightness, position, etc., are calculated and updated in each frame. Using Real-time light mode means that everything in your scene that is related to that light is dynamic and will be updated with every frame.
To put it simply, Real-time light modes contribute direct light to the scene and update every frame so that, as lights and GameObjects are moved within the scene, lighting will update instantly. This light mode is useful for illuminating characters or other movable geometry.
By default, directional lights, Spot Lights, and Point Lights are Real-time, but they can always be changed to Baked and Mixed. Real-time lights have a high computational value and can be CPU and GPU intensive.
Baked Lighting
Unlike Real-time Lighting, in Baked Lighting mode, the editor performs all the lighting calculations for the light in the editor and stores the data (as texture) as lighting data on your system's disk. Then, when reapplied in runtime, it illuminates the surfaces using the saved texture.
Baked Lighting is used to simulate realistic lighting for scenes while reducing the CPU (Central Processing Unit) or GPU (Graphics Processing Unit) costs of running the game. Baked Lighting is lightweight and used for mobile games or scenes where you don't need the computational expense of Real-time lighting.
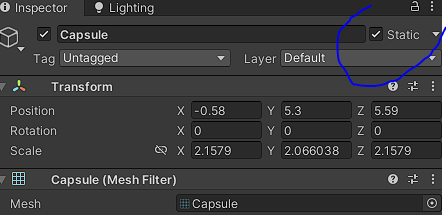
When you set a light to Baked mode in Unity, you tell Unity that the light will not move in runtime. So if you cast a Baked light on a movable or destructible object, the light will remain the same when the object has moved or is destroyed, creating an unrealistic scene. To avoid this, all objects affected by Baked lights have to be marked as "static" in the inspector.
Here's a great video that further explains light baking in Unity.
Mixed Lighting
As the name suggests, the Mixed Lighting Mode combines Real-time and Baked Lighting. Mixed Lighting allows a light to have all the benefits of a Baked light while keeping the dynamic shadows of moving objects that Real-time lights offer, all from the same light source.
If that's difficult for you to understand, think of it like this: Mixed Lighting allows a single light source to provide both direct and indirect light. Using mixed light involves more operational computation per scene than either Baked or Real-time Light, so it is not advised to use it to build something light, like mobile games.
Conclusion
If you're reading this, congratulations! You now know the basics of lighting in Unity. Fully understanding everything about lighting in Unity is a complicated journey, but now that you know the basics, you're already halfway there. I hope you enjoyed this article. See you in the next one!
LogRocket: Full visibility into your web and mobile apps

LogRocket is a frontend application monitoring solution that lets you replay problems as if they happened in your own browser. Instead of guessing why errors happen, or asking users for screenshots and log dumps, LogRocket lets you replay the session to quickly understand what went wrong. It works perfectly with any app, regardless of framework, and has plugins to log additional context from Redux, Vuex, and @ngrx/store.
In addition to logging Redux actions and state, LogRocket records console logs, JavaScript errors, stacktraces, network requests/responses with headers + bodies, browser metadata, and custom logs. It also instruments the DOM to record the HTML and CSS on the page, recreating pixel-perfect videos of even the most complex single-page and mobile apps.
Try it for free.
Source: https://blog.logrocket.com/lighting-basics-unity/
0 Response to "How to Turn Off Continuous Baking in Unity 5"
Postar um comentário